


Let’s get started on this fun Scrap Block Christmas Tree tutorial!

I’m not joking when I call this a scrap block tree. I literally went into my garage and came up with enough wood to make this cute little tree. So yep, it was free!
You could also use a one piece of 2x2x8 that you can buy at Home Depot or Lowes for under $5. That would be enough to make two trees by the way. Pretty inexpensive!

With a table saw you will cut your wood into the following lengths:
1 = 2 inches
2 = 3 inches
3 = 4 inches
4 = 6 inches
5 = 7 inches
6 = 9 inches
7 = 10 inches
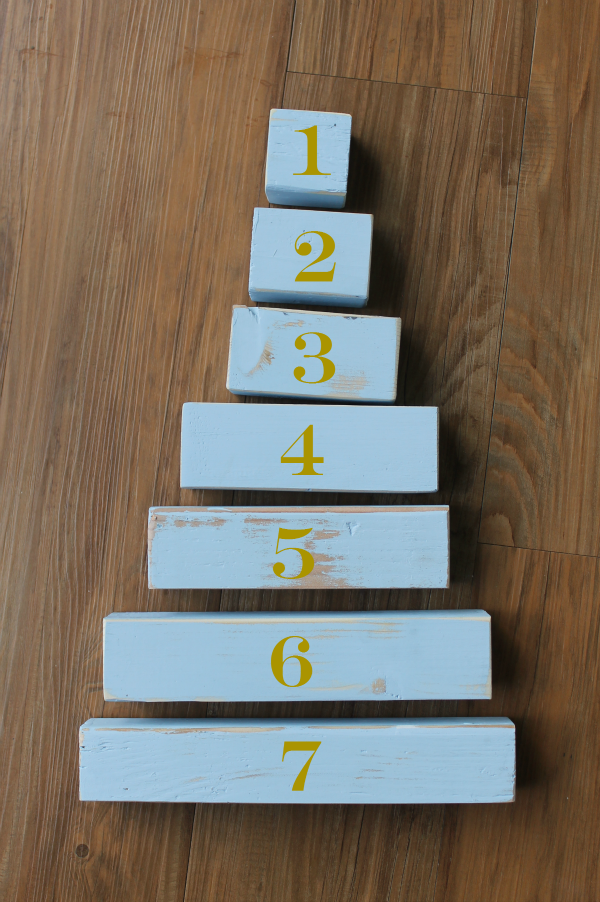
After you cut your wood be sure to sand them. Then I painted my blocks with one coat of chalk paint. You could also use acrylic paint. After the paint dried I sanded the edges with a hand sander. Then I applied my vinyl lettering.

I combined two images (this one and this one) that I found in the Silhouette online store to cut my vinyl out in or just use your favorite fonts. If you don’t own a Silhouette you could use paint pens or a stencils to decorate your blocks.
It would be super cute to paint these using chalkboard paint. Then let the kiddos take turns “decorating” the tree with chalk!

These would also make great gift ideas for neighbors and friends!
